
What a weekend!
Katie and Sarin’s wedding was fantastic – Katie looked beauuuuutiful, and despite the heat, everyone had a great time and loved their Chocolate covered pretzels! (even if they were a little on the melted side)

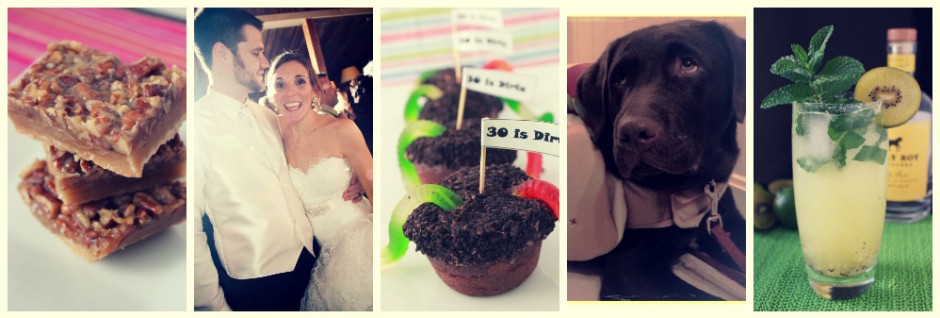
That’s a happy pretzel eater!
After all that dipping though, I needed a cocktail, big time. And it was a perfect weekend to try a new drink! I’ve had margaritas on the brain with all this beautiful weather, more specifically, though, Beergaritas. I’ve seen a few recipes for this delicious combo of tequila and beer and while it sounds dangerous, it also sounds delicious!
One of my favorite summer time drinks is a nice cold Blueberry beer, especially when it has nice, plump, beer soaked blueberries bobbing on the top of it! So I adapted this recipe from Eat Yourself Skinny, swapping out the regular beer for Blueberry beer, and infusing the limeade with fresh Blueberries! OMG.
Blueberry Beergaritas
Adapted from Eat Yourself Skinny
INGREDIENTS
*yields 4 Blueberry Beergaritas
1 cup Blueberry Limeade
(recipe below)
2 shots of your favorite Tequila
1 – 6oz package of fresh blueberries
2 – 12oz. bottles of your favorite Blueberry Beer
INGREDIENTS FOR LIMEADE
1 – 6 oz container of fresh blueberries
zest of 2 limes
1.5 cups of water
1/2 cup splenda (or sugar)
2/3 cup fresh lime juice
(juice of about 8-10 limes)
1) To make Blueberry Limeade: Dump the fresh blueberries in a medium saucepan. Take a fork or bottom of a wooden spoon to break the skin of the blueberries (this will help the juice from the berry to mix into the limeade). Add the lime zest, water and splenda and heat over medium heat until the splenda dissolves completely. Strain the blueberries and lime zest from the Limeade with a mesh strainer. Let mixture cool at room temperature and then stir the fresh lime juice in. Chill for about a 1/2 hour.


2) For Blueberry BeerGaritas: In a cocktail shaker, take 2 shots of tequilla and 1 cup of Blueberry Limeade and shake for a few seconds until fully combined.
3) Place a few blueberries at the bottom of 4 margharita glasses (and ice if you like). Distribute the tequilla/limeade mixture into the four glasses.

4) Top the rest of each glass off with the 2 bottles of Blueberry beer (you could also just pour the ingredients all into one pitcher as well – either way it yields about 4 Beergaritas.)


And to answer your question – yes, these are as good as they sound!!!!
I hope you all had a fantastic long weekend – bring on summer!

This weekend is really special for a LOT of reasons:
- It’s Memorial Day, which means summer is right around the corner at the local bar, waiting for us to meet it!
- It’s the first holiday off from work I’ve had since New Year’s Day (it was a LONGGGG winter – oye)
- One of my bestest friends from home is getting MARRIED!!!

Sarin ‘Va’ and Katie ‘Janda’ = The VaJandas – they’re very serious and unfun
I’ve known my friend Katie since middle school – she was kind of a ‘bad-ass’ who liked SilverChair and wore ‘skater’ sneakers and I was a preppy nerd that listened to Color Me Badd and wore Champion Sweatshirts with Stretch Pants for the better part of my adolescense. But nevertheless, Katie and I became friends, stayed friends all through High School, and College, heck we even lived together for a year! I was actually there the night that I believe commenced the ‘BF/GF’ stage of the VaJandas. We were out celebrating a birthday with these ‘guys’ that Katie and a couple other gal pals had met a couple weeks beforehand at a bar. And on this fateful night, out of the corner of my eye, I noticed some serious VaJanda smooching action. I think it was then I knew that Sarin was going to be around for more than just last call!
And a few years later, on this Memorial Day weekend, they’re getting married, in a gorgeous barn right outside of Boston and it’s going to be hot and sunny and just the most perfect day ever!
Last year, before my food blogging adventure began, I started this wacky little hobby involving chocolate covered pretzels, one of my most favorite snacks in the world. I did a lot of dipping and drizzling, ate a lot of chocolate, and had lots of fun doing it. And Katie had asked me all the way back then to make favors for her wedding. And I thought maybe she’d come up with a better idea between then and now, like ya know, candles or some other fun favor you get at a wedding, but she didn’t!
Katie and Sarin’s Chocolate Dipped Pretzels
INGREDIENTS
(*this will yield about 2 or 3 dozen)
1 bar of Milk or Dark Chocolate, broken up into pieces
(I use the Trader Joe’s ones – and after I’ve eaten about 10 squares of chocolate to make sure it tastes ok, then I get down to business)
1 bag of UTZ Sourdough Special pretzels
(a nice size for a medium/large sized pretzel – you could use your favorite though)
Wilton Colored Chocolate Melts
(like the kind you buy at Michaels or AC Moore to make chocolate pops or candies – they have a zillion colors – I used white and blue to match Katie’s color scheme)
TOOLS YOU WILL NEED:
Double Boiler
(recommended, but you can ‘make your own’ if you don’t have one)
Silver or Plastic tongs
Plastic Drizzle Bottles
(can be purchased in the candy making section at your local craft store)
Wax paper/wire racks
1) Fill the bottom pan of your double boiler with water and let it come to a boil. If you don’t have a double boiler, you can take a regular saucepan and fill it with water. Just make sure you have another pan/bowl that will fit on top of it for the chocolate to melt in.
2) When the water starts to boil, you can add the broken chocolate pieces to the top sauce pan. Only place 2/3 of the chocolate pieces in, reserving 1/3 of it until later. Make sure to keep stirring the chocolate as it melts.
3) When the chocolate has melted in the top pan, remove it from heat, and add the other 1/3 of the broken chocolate pieces to the melted chocolate – stir until these pieces melt completely. (this is known as ‘tempering’ your chocolate)

4) Take your pretzels and drop one or two (depending on how large your pan is) into the chocolate, submerging them so that they are completely covered.

5) Once they have been covered, remove the pretzel from the chocolate with your tongs. Set on a wire cooling rack covered with wax paper to let dry.


6) Once all of your pretzels have been dipped, you can now begin the ‘drizzle’ process – repeat the same process that you did with the milk/dark chocolate with the candy melts (if you have more than one color, you could set up two double boilers, just keep an eye on them as they melt so they don’t burn).
7) Once the candy melts are completely melted, pour the chocolate into the drizzle bottles. If you have two different colors, you can alternate (I did white first, then blue) or if you have just one, you could do a couple different layers of drizzle over the pretzel.


8) Optional – to give them a more ‘finished’ look, I will finish the pretzels off with a top layer of milk or dark chocolate drizzle, depending on which type I used. Again, this is optional – it’s a bit more work (and bottle cleaning) but I think it just gives it a more complete look. But that’s just me!

9) Depending on what your plan is for the pretzels, when they are completely dry (this could take a while – when the chocolate is no longer shiny, you’re safe) , you can lay them out on a pretty platter, or wrap them individually in cellophane bags, tied with some pretty ribbon. For Katie and Sarin, it was a super cute brown take out box, with some green moss, tied with the same twine they used for their wedding invitations and fun sticker with their names on it.

So there it is folks: two late night dipping sessions, 140 boxes and 280 pretzels later, Katie and Sarin’s Chocolate Dipped Pretzels, for the chocolate dipped pretzel lover in you. I know they’re pretty basic, but this method seems to work well for me. But it’s a free country – dip as you see fit!
And to Katie and Sarin – have the BEST day tomorrow! Enjoy every last second – and every last bite of your pretzels 🙂


It’s been a couple months in the food blogging world, and I think it’s going pretty well so far. One Tastespotting spot, a Kreativ Blogger award, photos that have gone from ‘meh’, to ‘less meh’, and lots of delicious new recipes, with only a few that were too awful to write about (twice baked sweet potatoes – do NOT try this at home people)
When you start really investigating food blogs, you discover all these creative recipes, with combinations and presentations that you would never in a million years have dreamed of putting together, accompanied by incedible food photos that looks so delicious, you wish you could crawl through your computer screen, put the plate on your table and dig in.
And you picture your favorite food bloggers that create this recipes and photos – you paint a picture of them in your head, using your imagination (or seeing their picture on their ‘about me’ page). You envision them in their pristine kitchens, with mahogany floors, cabinets apon cabinets full with every All-Clad pan that has ever been created, kitchen gadgets that seem like they shouldn’t be legal in the U.S, and sprawling granite countertops as far as the eye can see. And they’re perfectly primped and pressed – their aprons are so cute and stylish that you could probably wear them as part of an outfit, and there’s not a spot or stain on it. Their counters are never cluttered. Their dishes never dirty. They are the epitomany of food blogging perfection.

I bet her pictures are amazing too
Dave and I’s world is somewhat different however.
When we first moved in, we thought our kitchen was HUGE! “GREAT for entertaining” our realtor told us. We stood there with him, envisioning dinner parties with friends, wine flowing like water, laughter and music and 5 course meals – not realizing that there was about 2 square feet of counter space and all of 4 cabinets in which to fit our entire kitchen life into.

Initially this wasn’t a problem: Dave had a set of 8 white IKEA dinner plates, all with chips and cracks in them. We had a smattering of random appliances, pots and pans, and most of our ‘gadgets’ had been bought from the clearance bin at the Christmas Tree Shop. But then, we got engaged – we registered – I had 2 showers – we got ALOT of kitchen stuff – real life adult kitchen stuff. And we thought “Where in the world is all of this stuff going to go?”.

We’ve done pretty well improvising with storage, but cooking on the other hand can be a real challenge. Our stove, sink and cabinets are shoved into a small ‘galley style’ area of the kitchen, along with the 2 square feet of counter space. So if Dave and I are wanting to have a romantic night in the kitchen, sipping wine, cookin’ up something delish together, it usually turns into a night of clever maneuvering around each other to avoid 3rd degree burns from bumping into the stove.

And our cooking attire? My cute Vera Bradley apron has more grease stains than paisley flowers, and 9 times out of 10, it’s tied over my gym clothes or pajama pants, which I think I’ve had since my Junior Year of high school. And if Dave’s not standing over the stove in his Stanley Cup Sweatpants, it’s usually a pair of tattered jeans that I’ve tried to replace with new ones that still have the stickers on them, or an old under shirt, such as the one pictured below.

So there’s the ugly truth of the Schoon Kitchen. It may not be as glamorous as the likes of Ina Garten, or any other all-star food blogger, but after almost two years, we’ve figured out ways to make it work, while still being able to produce some pretty decent meals. In our next house, perhaps we’ll have the endless granite countertops we always drool over when watching the food network, or a collection of appliances only seen in an Iron Chef kitchen. But for now, I still get excited every time I get to use my KitchenAid (even if I do have to balance it on a kitchen stool) and after replacing our IKEA plates with Crate and Barrel ones, I think we feel pretty hip!
As for the rest of the clutter? Well, that’s what Photoshop is for!

I can smell summer – this weekend is Memorial Day, which is like the unofficial kickoff of most people’s favorite season of the year (for me, it’s a close tie with fall – and I kind of like winter too? I know – weird)
But with summer comes all this delicious fresh produce! Tomatoes yanked right off of the vine – corn fresh out of the husk – it’s the season for grilled meats, salads and salsas and cocktails served in frosty glasses with drink umbrellas by cute pool boys who spray you with water if you get too hot…
Wait a minute – I’m getting ahead of myself here. It’s pouring rain outside right now – can you tell that I’m fantasizing as I’m typing this?
Well back to the rainy reality of the moment – until the time comes that you can be waited on hand and foot by a cute cabana boy, try this Black Bean, Corn and Tomato Salad. It went perfectly with steak that we made on the grill, but it could also serve as a hearty salsa with salty chips and icy margharitas.
Is it Friday yet?
Black Bean, Corn and Tomato Salad
Adapted from Skinny Taste
INGREDIENTS
1/4 red onion, chopped fine
juice of 2 limes
1 garlic clove, minced
1 tsp. chili powder
1/2 cup fat free Italian Dressing
salt and pepper to taste
2 medium vine ripe tomatoes, diced
1 cup canned black beans , drained and rinsed
1 cups frozen corn (or canned, or fresh, whatever ya have)
2 tbsp. finely chopped cilantro
1) Combine red onions, lime juice, minced garlic, chili powder, italian dressing, and salt and pepper in a medium bowl. Set aside.

2) Add chopped tomatoes, black beans, corn and cilantro and let sit at room temperature for about 1/2 hour.

Perfect for your Memorial Day cookout this weekend, pool boys or no pool boys 🙂

here’s to hoping!

So I know, it’s Sunday – and I’m posting Thirsty Thursday’s cocktail – I’m a bad blogger! This weekend in Boston was AMMMMAZZZZZNG so I was trying to take advantage of the fabu weather (this is New England afterall – it could be snowing tomorrow).
BUT, I do have a delicious cocktail recipe for you guys, whether it’s for Thirsty Thursday or Friday or Saturday – or heck maybe even Sunday! Who said you can’t enjoy a cocktail on the Sabbath?
I had bought some herbs at a local farmers market, one of them being mint. I love the smell of fresh mint. It’s just so – minty. And this mint plant really seemed to take off all of a sudden! And I was afraid that if I didn’t start snipping it and doing something with it, it would die.

So what’s the first thing I think of when I think of great uses for fresh mint? MOJITOS, obvi! So I decided to make my own mint infused simple syrup. Most mojito recipes call for simple syrup and mint as well. So why not infuse the mint into the simple syrup?
The mint simple syrup was super easy to make – 3 ingredients (I swapped out the sugar with Splenda to save some calories) – splenda, water and mint leaves.
Mint Simple Syrup
Adapted from Epicurious.com
INGREDIENTS
1 cup water
1 cup splenda (24 mini packets – oof)
1.5 cups packed mint leaves
1) Chop mint. In a saucepan bring sugar, water and mint to a boil, stirring until sugar is dissolved. Simmer syrup, undisturbed, 2 minutes. Pour syrup through a fine sieve, pressing hard on solids, and cool.


You can use this right away, or let it sit for up to a week. It’s so yummy!
Skinny Strawberry Mojitos

INGREDIENTS
3 strawberries, sliced
10 mint leaves, chopped
Juice of 1/2 lime
1.5 oz rum
1 tsp. powdered strawberry drink mix, like Crystal Light
1 tbsp. mint simple syrup
Seltzer water or Club Soda
1) Take the strawberry slices, chopped mint leaves and the lime juice and muddle at the bottom of a cocktail shaker until combined.


2) To the muddled mixture, add the rum, strawberry drink mix and simple syrup to the cocktail shaker. Shake for about 10-15 seconds until the liquid is fully combined with the muddled fruit.
3) Fill a glass with ice – pour the mixture from the cocktail shaker into the glass and then fill the remainder of the glass with seltzer or club soda.

So, by the power vested in me, go – go now – make yourself one of these mojitos! I’ts Sunday, tomorrow’s Monday, so that means you need to live up these last few hours of the weekend as much as possible. And I would advise doing it with one of these in your hand (maybe in both hands! They’re skinny, so you can have two….or three…..or ten:))


Pizza is one of my favorite things in life, and always has been. I would like to actually shake the mans hand who invented this ingenius creation of sauce, cheese and crust. Really – I might hug him (or her). It’s always a crowd pleaser – you can eat it plain – you can add toppings – you can make it thick – you can make it thin – you can make it circle – you can make it square. There’s really not much that you CAN’T do with it! It may be one of the most versatile foods ever.
A few years ago for my birthday, Dave’s mom bestowed upon us our very first pizza stone and I never knew how much a slab of stone could change someone’s life until this moment. We would make pizza on a cookie sheet or basic pizza pan, and it always tasted good. But the stone – the stone! OMG! Then we started to experiement with different crusts, finding one that was our favorite, and then Dave started getting really fancy doing things like ‘priming the dough’ to make it rise perfectly and have the perfect balance of crispiness and softness, the way the professionals do it. Our version of ‘priming’ involves sticking the dough in a trashbag submerged in warm water in the sink for about a half hour – I’m sure there are better ways to do it, but if you’re in a time crunch it works very well! Otherwise you can just leave the dough out for a few hours, and let it get big and puffy (very professional terminology here :)) It really does make a difference!
We love the basics – margharita, pepperoni, maybe a meat lovers if we’re feeling adventurous. But this idea for a new kind of pizza came to me, inspired by this great recipe I got from Picky Palate for Spinach Dip Bread Bowls. YUM. Perfect appetizer for anyone looking for a new one to throw into the rotation. I decided to swap out the Spinach with Kale and use the dip as the ‘sauce’ for the pizza (sounds sinful I know) and then Dave suggested adding yet another twist to this already seemingly twisty pizza – big chunks of crispy pancetta. Yes. We went there. And it was awesome.
Kale and Krispy Pancetta Pizza
INGREDIENTS
3 Tablespoons extra virgin olive oil
4 Cups Kale, coarsely chopped
1 clove fresh garlic, minced
3 oz softened cream cheese
1/2 Cup light sour cream
2 Tablespoons fresh shredded parmesan cheese
1/8 teaspoon Garlic Salt
1/8 teaspoon Sea Salt
1/8 teaspoon freshly ground black pepper
1 ball of your favorite pizza dough
4 slices of pancetta, cut 1/4″ thick, chopped into small pieces
4 – 8oz Shredded mozzarella cheese
(it’s really your preference – the ‘sauce’ is pretty rich, so you may not want to use as much cheese as you typically would with a regular pizza – or maybe you would! to each his own!)
1) Preheat oven to 500 degrees
2) Prepare your dip: Heat 2 tbsp oil in medium skillet over medium heat. Cook and stir 2 cups of the kale until wilted, about 3 minutes then add garlic, cook and stir for another minute then turn heat off. Place cream cheese, sour cream, cooked kale and garlic, parmesan cheese, garlic salt, salt and pepper into a medium bowl. Mix until well combined. Set aside.
3) Heat the other tbsp. of oil in the same skillet you prepared the kale in over medium heat. Cook the chopped pancetta in the skillet until crispy (about 3-5 minutes depending on how small it’s chopped) At the very end, right when the pancetta is about done, take the other 2 cups of chopped kale and place in the skillet with the pancetta, allowing it to wilt just a little (about a minute) It will cook more in the oven while the pizza is baking.
4) Assemble your pizza: roll out your pizza dough and place on the stone (or baking sheet). Layer the kale dip, then the shredded cheese, and then the kale/pancetta mixture on the top. Cook in preheated oven for about 10 minutes until cheese becomes golden on top.
Wowie Wow Wow Wow. Good stuff guys! The kale and the pancetta worked so well together – kale can be a little bit on the bitter side, but the saltiness of the pancetta really balanced the bitterness out. And the creamy kale dip base was such a yummy departure from your standard red sauce. So good!
I think even Popeye would swap his spinach for kale and put it on a pizza – that’s how good it was.

“What have I been missing all these years with Spinach!”

I’m not really sure where the term ‘dirty thirty’ came from, but I like it – it has a nice ring to it.
For some people, thirty is a huge milestone. For others, maybe not so much. For 12 of my college girlfriends and I though, it was a reason to CELEBRATE! We talked about this monumental birthday all through college, thinking that it was so far away – and then people started to settle, get engaged and married and have babies, and we realized that this big birthday we were going to celebrate hugely was rapidly approaching. So last year, we tossed many ideas into the ring: a week in Costa Rica, a long weekend in Napa, and finally, with busy schedules and all, we were able to nail down a long weekend in Nantucket. And it was PERFECT. Perfect weather, perfect house, perfect way to celebrate our innauguration into the thirty club.

INGREDIENTS
1 Box of your favorite chocolate cake mix
(usually yields about 2 dozen cupcakes)
1/2 package of Oreo Cookies
Chocolate Buttercream Frosting
(recipe below)
Gummi Worms
Toothpicks/Short bamboo sticks
1) Prepare cupcakes according to instructions on the box (you could also be reallly ambitious and make your own cake mix, but during the week, ambitious’ness can be difficult)

2) Place the 1/2 package of oreos in the food processor and pulse until they become a ‘dirt-like’ texture. Place in a shallow mixing bowl and set aside.
3) Take the toothpicks/bamboo sticks and stick them through the first 1/3 of the gummi worm so there’s still a little poking out (with the longer bamboo sticks you may have to end up breaking a little of the stick off to stick it in the cupcake)

4) Slather (I love that word) a large spoonful of the frosting on each cupcake (you could pipe the frosting on too if you wanted to be a little fancier).

5) Take the cupcake and dip it, frosting side down, into the bowl with the oreo crumbs.

6) Stick 2 gummi worms with sticks inserted into them in the cupcakes.

Chocolate Buttercream Frosting
*From Stitch Cake
INGREDIENTS
1 cup unsalted butter (2 sticks or 1/2 pound), softened (but not melted!)
3 1/2 cups confectioners (powdered) sugar
1/2 cup cocoa powder
1/2 teaspoon table salt
2 teaspoons vanilla extract or 1 teaspoon almond extract
4 tablespoons milk or heavy cream
1) Cream butter for a few minutes in a mixer with the paddle attachment on medium speed. Turn off the mixer.
2) Sift 3 cups powdered sugar and cocoa into the mixing bowl.
3) Turn your mixer on the lowest speed (so the dry ingredients do not blow everywhere) and mix until the sugar and cocoa are absorbed by the butter.

4) Increase mixer speed to medium and add vanilla extract, salt, and milk/cream and beat for 3 minutes.

These are fun and DELISH! Naturally, you don’t have to add the “30 is Dirty” flags, but I thought they added a little zazz.
So cheers to 30! If you’ve already made it over the hump or if it’s rapidly approaching, here’s the perfect dessert to celebrate your ‘Dirty Thirty’.
What a weekend it was! Took a few days from new recipes and blogging and spent a LOVELY weekend on Nantucket and Cape Cod with my bestest bestest friends from college and my home town. The weather was perfect – the company even more perect – the wine/beer/delicious drinks flowed like water, and the food eating that was done was enough to give any person a food hangover. So today, it’s back to work, and while I feel about 10 pounds heavier and many dollars poor’er, the time was worth every last extra cellulite dimple and penny spent.
And I came back to realize that one of my most fave blogs that was one of the first I discovered when entering the food blog world, Miki’s Kitchen, nominated me for an award! How fun is that? Miki’s recipes are so awesome. She has about 10 different kinds of cupcakes I want to try to make – and I know they would never come out as fancy or perfect looking as hers do, but hey, one can hope. Her recipes are simple and easy and look absolutely delish, so thank you Miki for the vote, and also the delicious new recipes to add to my list!

“Ohhh Miki, your recipes are so fine, your recipes are so fine, they blow my mind, Hey Miki!”
Now, down to business. The blog award is the kreativ blogger with this nomination, i am supposed to write 7 things about myself that readers might find interesting. Would I call these facts interesting? Meh – depends on how bored you are! 
1) In just about 6 weeks, I will be a new mom…….

….to one of these adorable pups!!!! Haha – phew. In a couple weeks, Dave and I will be headed out to pick out our first ‘child’, Hairy Maclary Schoon. For those of you wondering “WTF kind of a name is that”, I will tell you! Hairy Maclary is a fictional dog from a series of children’s books created by an author in New Zealand named Lynley Dodd. Why are we naming him that? He was on the side of our camper van in New Zealand! Dave and I had many arguments about what we were going to name our future dog – and once we picked up our van in New Zealand and saw that there were dogs on the side of it, the decision was made!

Dave and Hairy – he likes sausages
2) My full time job involves metal construction. Be jealous – be very jealous.
3) I am an only child – don’t judge
4) Since Dave is technically part of this blog, an interesting fact involving him: he was missing his front tooth on our first date after getting it knocked out at a hockey game the night before. Needless to say, he had pasta and ate it very slowly 🙂
5) I really like the smell of funny things, like musty basements and rubber cement. Oversharing?
6) I have a shameless obsession with Real Housewives – especially Jersey – I secretly want to be one of their neighbors, or part of the Manzo family. Although I think Dave would divorce me if I ever suggested moving there. One can dream I suppose!
7) Another Dave fact: he has an obsession with monkeys.
Ok folks, there it is: our most interesting facts – take ’em or leave ’em!
Now, onto MY favorite ‘kreativ’ blogs!
1) Miki’s Kitchen (is that allowed to vote her back? I sure hope so!)
2) Eat Yourself Skinny (Kelly was on Dr. Oz recently – how cool is that?)
3) Skinny Taste
4) The Blond Cook
5) Closet Cooking (I know he has a zillion followers, but his frequent inclusion of buffalo chicken in recipes is amazing)
6) The Galley Gourmet
7) Taylor Takes a Taste (awesome recipes AND photography tips!)
And if you get nominated, some rules for you:
- thank the blogger who gave you the award and link back to their blog.
- copy the kreativ blogger award logo and place it in your post.
- list 7 things about yourself that people might find interesting.
- nominate 7 other kreativ bloggers.
- leave a comment on the blogs you listed to let them know you nominated them.
So thank you Miki! And thanks to these blogs and all the others that are so creative and fun to read and aspire to be like 🙂 And now it’s back to the blogging wagon after falling off for a few days!

Scones are kind of a funny thing – they seem to contradict everything that is known to be delicious about a baked good. They’re kind of crumbly – kind of dry – they usually have fruit in them like raisins or cranberries (raisins are what the ‘bad houses’ give away on halloween and cranberries go on a string with popcorn on a christmas tree) but I LOVE scones! Love them! I think I started to get into them when a group of gal pals and I invaded Ireland our Junior year of college to visit some other gal pals that were studying abroad there. Irish people know a scone – they know how to make it good, raisins and cranberries or not.

The gals in Galway, 2003 – we were so happy – I think we had just eaten a scone 🙂
But when I have a scone, I like when it’s more like a ‘dessert’ than a breakfast pastry. So I found this recipe for Cream Scones from Martha Stewart, and turned it into what I call an Almond Joy Scone – the crumbly buttery base of a scone with chocolate chunks, coconut and toasted almonds.
Is it bad to drool when you type?
Almond Joy Scones
INGREDIENTS
3/4 cup, plus 1 tbsp cold heavy cream
1 large egg
2 cups all purpose flour, spooned and leveled, plus more for work surface
1/4 cup granulated sugar
2 tsp baking powder
1/2 tsp fine salt
6 tbsp (3/4 stick) cold, unsalted butter, cut into small pieces
3/4 cup sweetened, shredded coconut
3/4 cup sliced, toasted almonds
3/4 cup milk chocolate chunks
1) Preheat oven to 400 degrees
2) Whisk together 3/4 cup cream and egg in a bowl.

3) Mix together flour, sugar, baking powder and salt in a large mixing bowl. With a pastry blender or 2 knives, cut butter into flour mixture until it resembles coarse meal with a few pea size pieces of butter still remaining. (I ended up just using my hands to blend the butter into the flour – it seemed to work better than the knives)
4) Stir in chocolate, toasted almonds and coconut into the flour/butter mixture. Then, mix in the egg/cream batter with a fork until just combined (dough should still look crumbly – try not to overwork it)

5) Transfer dough to a lightly floured surface and pat it into a square or circle until the dough is about 1″ thick. Take a glass (or a round shaped cookie cutter) that is about 1.5-2″ in diameter. This will yield about 12-14 scones (you can re-roll the dough scraps after you get the first round of scones cut from it to make more). You could also cut them in wedges too, or squares. Whatever your favorite shape!

6) Transfer cut scones to a parchment paper lined or greased baking sheet – brush tops of each scone with remaining tbsp. of cream, and bake until golden brown, about 16-18 minutes, rotating the sheet in the oven half way through.

These are so yummy – you could eat them for breakfast with a nice cup of hot coffee…or for lunch with a diet coke….or for dinner with a glass of red 🙂 ENJOY!!!!