
It’s Friday! Woo Wooo Yeahh Yeahhh Woo Wooo Woooooo!
 I’m extra excited for this coming weekend because:
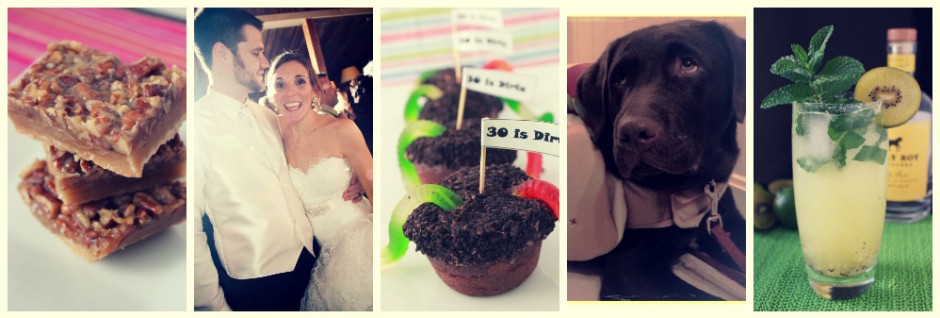
1) Tomorrow a WEDDING is happening!
2) I get to spend time with these clowns – a.k.a my family – a.k.a the farkles. Don’t ask.
My cousin Allison is getting married to Neil. They’re story is one of my faves. Al moved to Dublin to channel her inner Irish self a couple years after college – she met Neil, a legit Irishman who might be one the nicest guys I’ve ever met in my life – they fell in love – last year they got engaged in Budapest (NBD) and tomorrow they’re getting married! I’m picturing a lot of jigging on the dance floor and a lot of guinness consumption, but mostly, lots of laughs and fist pumps with family and friends!
I’ll be honest – there’s no correlation between Al and Neil nuptials and these Pumpkin Cheesecake Brownies, but nevertheless, they were amazingly easy to make (primarily cuz’ I cheated – cheaters DID prosper in this case!) and amazingly delicious.
Pumpkin Cheesecake Brownies
*Cheescake portion adapted from A Taste of Home
INGREDIENTS
Your favorite boxed brownie mix, prepared according to instructions
1 package (8 ounces) reduced-fat cream cheese
1/2 cup canned pumpkin
1/4 cup sugar
1 teaspoon vanilla extract
1 teaspoon pumpkin pie spice
1 egg

1) Preheat oven to 325 degrees (or whatever temperature the box says)
2) Prepare your brownie batter and set aside.
3) For cheesecake batter, in a small bowl, beat cream cheese and pumpkin until smooth. Beat in the sugar, vanilla and pumpkin pie spice. Add egg; beat on low speed just until combined.
4) Line a 12-muffin tin with paper baking cups. Fill the bottom about 1/3 of the way with brownie batter. Then place another 1/3 of pumpkin cheesecake batter on the top, and then top the last 1/3 with the brownie batter. Take a knife and swirl the pumpkin cheesecake and brownie batter together so they look ‘swirly’.
5) Bake for about 15-20 minutes until a toothpick inserted in the center comes out clean
*You could also make these as just a standard pan of brownies by again, following the instructions on the box for the different pan sizes and following the same method of brownie batter/pumpkin cheesecake layering and swirling.
My only change would be maybe alternating the pattern and doing cheesecake/brownie/cheesecake next time, as to make them a little more pumpkin flavored. But it’s totally up to you, depending on what flavor you prefer.
Next week is Halloween – BOOOOO!


Very VERY bad idea to be reliving this post from Saturday as I sit here at my desk eating my 100 calorie, whole grain VitaMuffin top.
Dave and I are very different when it comes to breakfast: he lives for it, and myself, I could probably live without it. On a Saturday morning, it’s always a struggle to decide what the first meal of the day is going to be. Dave usually wants to get up and use every pan we own to make a 5-course breakfast, whereas myself, I like to go out, get an iced coffee and a breakfast sandwich from my most favorite breakfast spot in the neighborhood – Magnificent Muffin. It’s a tiny, hole in the wall that I first was drawn to some years ago by the constant line out the door. And besides the fact that you can probably only fit about 5 average size humans in there at a time, the line is legit. Because their breakfast sandwiches are made-to-order, served hot off the griddle, and their muffins are in fact magnificent – it’s not even false advertising. And, the best part, every order comes with a side of sass from the owners – free of charge.
But this past Saturday, I was antsy to try this recipe for Pumpkin Chocolate Chip Pancakes that I found from Cozy Kitchen. Trader Joe’s has a really great Pumpkin Pancake & Waffle mix that I’ve used in the past to make PCCPcakes. But I tend to agree with the ladies at Magnificent Muffin – fresh ingredients and a side of sass make EVERYTHING taste just a little bit better.
Pumpkin Chocolate Chip Pancakes
*Modified from Cozy Kitchen
INGREDIENTS
*yields about 8 pancakes
1 cup all-purpose flour
1 & 1/2 tbsp light brown sugar
1 tsp baking powder
1 tsp baking soda
1/4 tsp salt
1 tsp cinnamon
1/4 tsp nutmeg
1/8 tsp pumpkin pie spice
1/8 tsp ground ginger
1 cup buttermilk, shaken
1 egg
1/4 cup pumpkin puree
1 tbsp unsalted butter, melted and cooled
1/2 cup chocolate chips
1) In a medium bowl, sift together flour, brown sugar, baking powder, baking soda, salt and spices. Set aside.
2) In a small bowl, measure out the buttermilk then add the egg and lightly beat.
3) Mix in the pumpkin puree with the egg and buttermilk and mix until completely blended. Then add the melted butter and mix again.
4) Add half the wet ingredients to the dry ingredients and mix lightly. Then add the other half and mix until the batter is just combined (there will be small-medium lumps). Add chocolate chips.
5) Heat your griddle over low/medium heat and spray with non-stick cooking spray or butter. Use about 1/4 cup of the batter and place in a round circle on the skillet. Cook until small bubbles form on the surface of the pancake and then flip over. Cook on opposite side for about a minute, or until golden brown.
6) Serve warm with LOTS of maple syrup.
OMG – the pumpkin – the chocolate – the syrup. I would highly recommend serving a nice, salty side with this like sausage or bacon, just to have a good balance of salty and sweetness (if that’s your thing). And, these literally took all of 10 minutes to make, so it was a GREAT Saturday morning breakfast!

October is just about over – and it’s been full of apples and pumpkins and and football – oh my!
But besides the peak month of fall, October is very important for another reason – it’s Breast Cancer Awareness month. Sadly, I bet a good number of us out there know someone somewhere who is living with, has conquered, or worse yet has lost their battle with this devastating disease that affects not only the person experiencing it, but their family and friends as well.
And unfortunately enough, it’s hit very close to home to us recently. Back in 2003, my Aunt Patti was diagnosed with breast cancer – and man did she kick it’s ass! By 2008, she was five-years cancer free and it was a thing of the past, never to show it’s ugly face again. Until this August, when some strange symptoms lead to the discovery that not only was it back, but it had metastasized to her liver. WTF cancer – I thought we made it clear you’re not welcome here b’otch! And while I wish that Breast Cancer was the ugly, long nailed wench with stiletto heels that I envision it being, and I could just put it on a one-way flight to Antartica, unfortunately it’s not the case.

The Murphy’s, sans pooches
Patti is wife to my amazing Uncle Kevin, and mother to my 3 beautiful cousins, Beth, Catilyn and Krissy, 2 sweet pooches, Maggie & Beau. Our families have always been close – growing up as an only child, Beth, Caitlyn & Krissy were the sisters I never had and still to this day, we have this amazing capability to pick right up where we left off, no matter how much time has passed, and act as silly and stupid as we did when we were 8. Patty & Kevin and the girls moved down South when we were still pretty young, so during the summer months, we would reunite on Cape Cod, making up for lost time by riding bikes, going to the beach, and spending as much time together as possible. In college, I spent one of the funnest summer’s of my life living with them at their Cape House, and this coming June, it will be the backdrop for my cousin Beth’s wedding, which cannot come soon enough! In the mean time, they’re taking things one day at a time, thinking happy thoughts, and even blogging about Patti’s daily progress which is a great idea to keep everyone informed. They even came out with a special Pink Patti Murphy Breast Cancer Awareness bracelet which are already flying off the shelves!
The Murphy’s are amazing cooks (Beth even went to cooking school – now that’s legit) and one dessert that reminds me of them and the Cape, is their lemonade ice cream pie – the simplest of concoctions that on a hot summer day is better than any ice cream cone you could buy. So while it’s fall, and the bathing suits have officially been swapped out for sweaters, today’s recipe is a summer throwback – that’s pink for Patti 🙂
Mini Pink Lemonade Ice-Cream Pies
*Adapted from Betty Crocker
INGREDIENTS
*yields about 12 mini-pies, with ice cream left over
10 graham cracker sheets, crushed into crumbs
(I used the food processor to get a fine crumb)
2/3 cup unsalted butter, melted
3 tbsp. sugar
4 cups vanilla ice cream or yogurt
1 – 8oz tub of whipped topping
(I used fat-free)
4-6 individual Crystal Light Pink Lemonade packets
(depending on how ‘lemonade’ey’ you want it to be)
*red food coloring
(this is optional, in case the crystal light doesn’t give you the desired level of ‘pink’ coloring that you desire)
1) Preheat oven to 350 degrees.
2) In a large mixing bowl, mix the graham cracker crumbs, butter and sugar together until well combined.
3) Using a 12-muffin tin, take about 1/4 cup of the graham cracker mixture and press in bottom and up the sides of each muffin slot.
4) Bake for 8-10 minutes until the crusts are golden brown. You’ll notice that the crust may rise a bit while baking. You can actually push it back down with your fingers so that it doesn’t take away space for the ice-cream mixture.
5) Once the crusts have cooled, fill each one with the pink lemonade ice cream mixture (you’ll definitely have some left over). If you’d like, you can sprinkle the tops with graham cracker crumbs or sprinkles, depending on if you like a little texture or not.
6) Let sit in the freezer for 3-4 hours until the ice cream has completely set.
7) Remove muffin tin from the freezer and let the pies sit for about 5 minutes. After 5 minutes, you can stick a knife in to pop them out.
These are amazingly cute, pink and delicious! Something about the taste of lemonade always brings me right back to summer.
So to everyone out there who is battling the Breast Cancer, you’re in the thoughts and prayers of people all over the world, not only this month, but always.
And to Patti, Kevin, Beth, Caitlyn, Krissy, Beau and Maggie, I’m thinking of you guys everyday and very much looking forward to June, when that ugly wench is far, far away, and we’re all together at the Cape, celebrating nothing but happy times with Lemonade Ice Cream Pie 🙂


Five little pumpkins sitting on a gate.
The first one said, “oh my it’s getting late.”
The second one said, “there are witches in the air.”
The third one said, “but we don’t care!”
The fourth one said, “let’s run and run and run.”
The fifth one said, “I’m ready for some fun!”
OOOhh OOOhh went the wind
And out went the lights
And the five little pumpkins rolled out of sight….
….or into my belly
When I first saw these, I thought “OMG – these are WAY too cute to actually eat” – but I got over that real fast 🙂
Pumpkin Whoopie Pies
Cookies & Cups
INGREDIENTS
*yields 14-18 whoopie pies
Pies
2 cups all purpose flour
2 Tbsp cocoa powder
1/4 tsp baking powder
1/2 cup room temp butter
1 cup light brown sugar
1 egg
2 tsp vanilla
1/2 cup buttermilk
Orange food coloring
Cream Cheese Filling
8 oz cream cheese, room temperature
1/2 cup butter, room temperature
1 tsp vanilla
2 cups powdered sugar
*mini pretzels
*green frosting
1) Preheat oven to 375 degrees.
2) Line your baking sheets with parchment paper or spray a baking sheet with non-stick cooking spray.
3) In a standing mixer, cream butter and sugar together then add egg and vanilla & mix until combined.
4) Mix your dry ingredients together.
5) On low speed add 1/3 of your dry mix, then 1/3 of your buttermilk…continue adding in this order until all your dry ingredients and milk are mixed in and smooth.
6) Now add your food coloring. You can use the Orange gel type, or I just used the red and yellow from the little 4 pack you can buy at the grocery store, alternating between the 2 until I got the right color (or until I ran out of yellow haha).
7) Mix on low to combine the food coloring, scraping the sides until color is even.
8) Place about 2 tbsp. of batter onto your baking sheets, about 2 inches apart. If you want them to really look pumpkinesque, you can place the batter in a ziplock or piping bag and pipe the batter onto the sheet in a fat heart shape.
9) Bake for approx 6-8minutes until they are set and spongy to the touch. Let cool on baking sheet for 2 minutes and then transfer to a wire rack to finish cooling.
10) In the mean time, prepare your cream cheese filling by creaming together your butter and cream cheese until smooth. On low speed, add in your vanilla and powdered sugar. Turn speed up to medium until combined, scraping sides of bowl when necessary.
11) Place about 1-2 tbsp. of filling on one side of the pie. Break off a a piece of a mini pretzel and place it in the frosting at the top to make your ‘stem’. Cover with the other half and pipe your ‘leaves’ onto the pie with green frosting.
I have a confession to make, that I actually make an oops when making these and added 2 sticks of butter vs. the 1 that was called for in the pie batter. I realized it when they came out of the oven without that puffy, cakey look that whoopie pies have. But, after several samples, I discovered that they were still pretty damn good! They took on more of a dense ‘cookie’ texture than the cake-like texture of a standard whoopie pie.
Regardless, this may be my favorite fall recipe yet! Go get your pumpkin on!


Donuts are pretty awesome. I know it takes like 7 days or something crazy like that for them to digest, but the 7 days is so worth it. A big tube of dough, fried to perfection, often covered with fun toppings like frosting, sprinkles or BUTTERCRUNCH (clearly this is my favorite) or even stuffed with creams and jellies. Even the straight up old-fashioned with no frills is like a little piece of heaven.
My friend Ash has a slight obsession with donuts. She’s done all kinds of research to find the best donut shops in the Boston area and beyond – not your ‘cookie cutter’ donut places like Dunkin or Honey Dew, but small, independently run places where the minute you walk in the door, the smell of donuts cooking away in the fryer stops you dead in your tracks. And if you’re lucky enough, the one they pick off the tray for you is still warm. (Linda’s Donuts and Ohlin’s Bakery in Belmont for all you Boston area readers – do it – go – now).
But Ash, being the teeny weeny little thing that she is, has the will power of a saint, and after hours and hours of donut research and spreadsheet compiling, instead of hunkering down on the couch in her drawstring pants with a baker’s dozen of the finest donuts the shop has to offer, she finally goes, selects the perfect donut, tears a crumb size piece of it off, eats it ever so delicately, and boom – she’s done with the donut. It’s witchcraft, I swear.
I myself also feel like a donut is a treat – it’s not a 5-day a week kind of breakfast. It’s a “Ooooh, I could really go for a donut” kind of breakfast. And Apple Cider Donuts, fresh out of the fryer, after a long day of apple picking, are one of fall’s gems. And, you can make them at home!
Apple Cider Donuts
*Modified from Sugar Crafter
INGREDIENTS
For the donuts
1 cup apple cider
1/4 cup butter, softened
1 cup sugar
2 eggs
1/2 cup buttermilk
5 1/2 cups flour, divided
2 tsp baking powder
1 tsp baking soda
1 tsp cinnamon
1/4 tsp nutmeg
1/2 tsp kosher salt
Vegetable oil, for frying
For the topping:
1 cup granulated sugar
1 1/2 Tbsp cinnamon
1) In a small sauce pan, boil the apple cider down until it is reduced to 1/4 cup. Allow to cool. In a large bowl, cream together the butter and sugar until fluffy. Beat in the eggs.
2) Beat in the buttermilk and reduced apple cider.
3) In a medium bowl, whisk together 3 1/2 cups of the flour, the baking powder and soda, and the cinnamon, nutmeg, and salt.
4) Add the dry ingredients to the wet ingredients until combined. The dough will be very sticky.
5) Transfer the dough to a floured surface and knead, adding in the additional flour (you may not need the full 2 cups – I think I used about 1.5), until the dough is no longer sticky.
6) Roll out the dough to a 1/2″ thick rectangle, cutting strips about 1/2″-1″ wide (depending on how large you want your donuts to be). Take each strip and roll it between your palms until it becomes rounded on the edges, and then form into a donut shape.
7) In an electric fryer or a deep pan, add 3″ of vegetable oil. Fry 5 or so donuts at a time, trying not to overcrowd them in the oil. Turn them several times, until they are browned and cooked through. The larger your donut, the longer it will take for the dough to cook through (I think I undercooked 2 batches until I finally got it right – I’d say at least five minutes). As long as you keep turning them in the oil from time to time, they will eventually cook through. They’ll be quite brown on the outside when they’re finally done, but don’t worry! They’re not burned! Just cooked to perfection 🙂
8) Dip them in the cinnamon/sugar mixture immediately.
9) Serve warm
As with most things, these are best fresh out of the oil, but are equally as good the next day! (Just ask Dave, who ate 2 for breakfast – but he doesn’t like sweets – riiiiiiiiight :))

We’re baaaa-aaaack! Were you nervous we had flown the coop? Well technically, I guess we did for a bit, now we’re back and ready to blog our socks off!
Where’ve we been for the last 2 weeks and change? Well I’ll tell you!
We spent a long weekend in Vermont with lots of:
1) Great friends & foliage:


2) Great Beer:


3) The wedding of a GREAT couple, our friends Maggie and Vinny! It was the picture perfect Vermont wedding, with every last detail covered, down to hand written notes from the bride and groom to every single guest at the wedding – my hand is cramping just thinking of it! What a great day it was.

4) A week in Chicago for the greatest metal show on earth (a.k.a – my ‘real life’ job as a metal tradeshow planning machine)
And all the celebrating, beer drinking and metal’ing has left me feeling a little under the weather with a headcold that hit me like a ton of bricks. That and the chilly fall air that has made it’s way to Boston, made me realize that it’s Chicken Chili time. It’s a great spin of that delectable Black Bean Vegetable Soup, with a few adaptations to make a little more ‘chili’esque’, while still being healthy.
Chicken Chili
INGREDIENTS
1lb 99% fat-free boneless skinless chicken breasts
1 packet of mild taco seasoning
2 tbsp. olive oil
2 large carrots, peeled and chopped
1 medium onion, chopped
2 large garlic cloves, minced
1 tbsp. Chili powder
1 tbsp. cumin
2 cups chicken stock
2 – 15oz. cans black beans, rinsed and drained
1 – 28oz can crushed tomatoes
1 – 8.75 oz. can whole kernel corn
salt & pepper to taste
1) Coat the chicken breasts with taco seasoning. Cook both sides of chicken in a large saucepan over medium heat until just browned on either side, and set aside.
1) In a large saucepan or dutch oven, heat olive oil over medium heat; cook onion, carrots and garlic until onion is softened (about 5 minutes). Season cooked veggies with salt and pepper.
2) In the meantime, take the crushed tomatoes and 1 can of black beans and puree them together in a food processor. Set aside.
3) Add chili powder and cumin to onion/carrot/garlic mixture and cook stirring for about a minute.
4) Add the chicken stock, 1 can of black beans and can of kernel corn and bring to a boil.
5) Once the veggies have come to a boil, add the black bean and tomato puree and browned chicken breasts to the pot. Reduce heat, cover chili, and simmer for about an hour. After an hour, the chicken will be fully cooked which will allow you to shred it using 2 forks. You can remove it from the chili to shred or shred right in the dutch oven. If you shred it outside, make sure to return the chicken back to the chili. Simmer on low heat for another 1-2 hours so the shredded chicken can absorb the flavors.
This is great for Sunday Funday, or even divvy’ing it up into individual containers for lunch during the week. It also freezes really well too, in case you have left overs.
I hope these last couple weeks have been as good for you guys as it’s been for us! But – it’s good to be back 🙂