
There’s a lot of things in life that I’m impatient about:
1) Christmas
2) Vacation
3) New seasons of Dexter and Homeland to start
So for me, slow-cooking is a real challenge. I’ve been known to burn an entire layer of skin off the inside of my mouth because I can never wait for things to cool down before I dive into them, because sometimes things just look sooooo goooood that I am willing to sacrifice a burnt tongue and those funny little blisters that form on the roof of my mouth to get that first bite.
And after waiting 6 hours for this Texas Beef Brisket to cook, well let’s just say R.I.P tastebuds.

I found this recipe on Food Network, and after reading a lot of the reviews underneath, it seemed to me that most people used it as a base and then added their own touches to it. Which is exactly what I did, and while sometimes my ‘a little bit of this and a little of that’ can lead to a mess of a dinner, this time I’m pretty sure I nailed it. And what better to serve Texas Pulled Brisket on than buttery biscuits?
Don’t even think about those 100 calorie sandwich thins. Don’t you dare.
Texas Pulled Beef Brisket Biscuit Sliders
*Inspired by Food Network – Biscuit recipe from Alton Brown
INGREDIENTS
For the Brisket:
3-4 lbs of beef brisket
1/2 tablespoon kosher salt
1/2 tablespoon seasoned salt
1 tablespoon brown sugar
1 teaspoon liquid smoke
1/2 teaspoon cumin
1 tablespoon garlic powder
1 tablespoon ground black pepper
1 tablespoon onion powder
2 tablespoons chilli powder
1 bay leaf crushed
2 teaspoons dry mustard
1/2 teaspoon crushed red pepper flakes
4 tablespoons olive oil
2 tablespoons stone ground dijon mustard
2 cups beef broth
2 – 12oz cans/bottles beer of your choice
(I used Sierra Nevada Celebration Ale which is like an IPA)
1) Preheat your oven to 300 degrees F. In a small mixing bowl, prepare your spice rub by combining all of the spices (from Kosher salt to red pepper flakes). Set aside.
2) In another small mixing bowl, whisk together the olive oil and dijon mustard until combined. Then rub the mixture all over the brisket. After the brisket is covered in the dijon marinade, you can then cover it with the spice rub.
3) Place the brisket in a roasting pan and cook uncovered for 1 hour.
4) After an hour, reduce the oven temperature to 250 degrees F. Remove the brisket from the oven and add the beef broth and beer to the bottom of the roasting pan. Cover with foil and cook for another 3 hours or until the meat has become fork tender and shreddable.
5) Shred the brisket, place the meat in a dutch oven or heavy bottom skillet with the juices from the bottom of the pan and simmer over low heat for 1-2 hours. This step really is optional, but I like to let the meat absorb all the flavors of the juices. You could also take the juices and reduce them in a small saucepan to make a reduction for the brisket.
For The Biscuits
INGREDIENTS
2 cups flour
4 teaspoons baking powder
1/4 teaspoon baking soda
3/4 teaspoon salt
2 tablespoons butter
2 tablespoons shortening
1 cup chilled buttermilk
1) Preheat oven to 450 degrees F.
2) In a large mixing bowl, combine flour, baking powder, baking soda, and salt. Using your fingertips, rub butter and shortening into dry ingredients until mixture looks like crumbs. (The faster the better, you don’t want the fats to melt.)
3) Make a well in the center and pour in the chilled buttermilk. Stir just until the dough comes together. The dough will be very sticky.
4) Turn dough onto floured surface, dust top with flour and gently fold dough over on itself 5 or 6 times. Press into a 1-inch thick round. Cut out biscuits with a 2-inch cutter (I don’t have a cutter, but the top of a wine glass works great!) Be sure to push straight down through the dough.
5) Place biscuits on baking sheet so that they just touch. Reform scrap dough, working it as little as possible and continue cutting.
6) Bake for about 15-20 minutes, until biscuits are tall and light gold on top.
7) Assemble your sliders by slicing a biscuit and loading it up with shredded brisket.
I had some broccoli slaw that I threw on for a splash of color, but even just on their own, these are little pieces of heaven 🙂

 Well folks, I think Dave might divorce me if I make one more Buffalo Chicken dish. But this last one (for a while) is beyond anything in my wildest dreams.
In college, there were two nights that were my favorite: Fridays and Toasted Ravioli night in Ray Cafe. The line would snake out the door and down the stairs, even in the dead of winter. Cheesy goodness sandwiched between two plump sheets of pasta, breaded and fried to perfection.

The irony of this particular recipe is that I was actually gonna round up this BC series with a skinny version of the Buffalo Chicken Eggrolls that I made a while back, as I knew I had some egg roll wrappers left in the freezer. When I went to take the egg roll wrappers out of the freezer though, I discovered that they were in fact won ton wrappers. Shoot.
Wait. Won ton wrappers. hmmmmmm.
The wheels turned.
“What can I do with won tons wrappers”?

BUFFALO CHICKEN RAVIOLI! That’s it!
Oh and I’ll fry them – what the hell.
When I say these are beyond amazing, they are b-e-y-o-n-d amazing. If you don’t need them all right now, fry half and freeze the rest for another time. Or make them all at once, and try not to finish all 3 dozen – I triple dog dare ya.
Toasted Buffalo Chicken Ravioli
INGREDIENTS
*yields just about 3 dozen ravioli
1 -15oz container part skim ricotta cheese
1 egg, lightly beaten + 3-4 more eggs, lightly beaten for lining won ton edges & dipping the raviolis
1 cup crumbled blue cheese
1 cup cooked chicken
2 stalks of celery, chopped small
2 small garlic cloves, minced
1 bunch of scallions, minced
salt & pepper to taste
1/2 cup Frank’s hot sauce
72 won ton wrappers
vegetable oil for frying
3-4 cups bread crumbs
*ranch or blue cheese dressing for dipping/drizzling and sliced green onions for garnish
1) In a small mixing bowl, combine the egg and ricotta cheese together until mixed. Then fold in the blue cheese crumbles and set aside.
2) In a medium saucepan, saute your cooked chicken, celery, garlic and scallions for about 3 minutes. Season lightly with salt and pepper. After 3 minutes, add in the Frank’s hot sauce and stir for another 1-2 minutes.
3) Add the hot chicken/veggie mixture to the ricotta/blue cheese and stir until combined.

4) Line 3 baking sheets with wax paper. Lay out 12 won ton wrappers on each sheet. Baste the edges of each won ton wrapper with egg wash, and then place 1 tablespoon of the buffalo chicken/ricotta mixture in the center of the won ton wrapper.
5) Cover each won ton with the other 36 wrappers, and seal each ravioli together with a fork, similar to how you would if you were sealing the edges of a pie together. These won ton wrappers make a sizeable ravioli, so feel free to trim them if you don’t want as much edging.

6) Let raviolis chill in the refrigerator for about 20 – 30 minutes. This will help them to stay together when you’re frying.
7) When your raviolis are ready, take medium-large, heavy bottomed skillet and fill it about 1/3 way with vegetable oil. Heat your vegetable oil over medium heat for 3-5 minutes until you start to see little ripples form, or when you flick it with water it makes a ‘sssssssssssssssssss’ noise (very technical I know – I don’t have a heat thermometer, so I make up my own methods!)
8) Take 2 shallow mixing bowls: in one, place the other 3-4 lightly beaten eggs and in the other, the breadcrumbs. Take 3-4 raviolis at a time, dipping them first in the egg and then the breadcrumbs, and then place them in the hot oil You don’t want to crowd them, so I’d advise only doing about 4 or 5 at a time, depending on how large your skillet is.
9) Let cook on one side for about a minute and a half, and then flip over and cook on the other side for another minute and a half. You can judge this time by how golden brown you want your raviolis, but 90 minutes on each side gave them a really nice golden brown color and a great crispy crunch.
*I highly recommend heating the oil in batches as well. You’ll find that the breadcrumbs will start to fall into the oil and burn, and if you use the same oil for all 36 raviolis, well they might get some burnt crumbs on the outside of them. So try refilling/heating your 2-3 times to avoid that burnt taste.
10) Once all your raviolis have been fried, you can drizzle them with ranch or blue cheese dressing and garnish with sliced green onions.
OR you could do what I did.
Skipped the dipping and garnishing – ate three of them right out of the oil and burnt the top layer of skin off of the roof of my mouth.
It was totally worth it 🙂

Been a while since we dipped into the Buffalo Chicken bank – we’re long overdue! I hope you don’t mind that the next few recipes will be allllllll buffchick allllllll the time.
What’s come out of our Buffalo Chicken Bag of tricks in the past? So many things…Buffalo Chicken Stuffed Peppers – Buffalo Chicken Tacos – Buffalo Chicken Egg Rolls – Buffalo Chicken Salad...drool…type….The idea for this little number though is totes stolen from one of my favorite guys on the planet, Trader Joe. I really can’t say enough about him and his amazing ability to reinvent food and make it fun, frozen (sometimes) and affordable!
What’s this rant about? Well, Dave and I are kind of obsessed with TJ appetizers. We’ve been known to even have “TJ Appetizer Dinners” which consists of heating up the oven to 425 (because somehow, it seems that nearly every TJ appetizer magically requires a preheated 425 degree oven) take out a cookie sheet (unless Joe has provided a handy dandy one that you just pop in the oven) and 20 minutes or less later, dinner is SERVED.
Last time I was there, I stumbled apon a new appy from Joe, Savory Profiteroles with Spinach Artichoke Cheese Dip a combination of my two favorite things – hot and cheesy spinach dip and cute little puffs of dough! And instantly I thought “ohhhh I know what I’m making this weekend for a hot new appy!” (no pun intended).

Buffalo Chicken Dip Profiteroles
*Profiterole recipe adapted from Anne Burrell
INGREDIENTS
*yields 2 dozen profiteroles with a little bit of dip left over, depending on how much you stuff them
For Profiteroles
1 cup water
1 stick butter
2 Pinches salt
1 cup all-purpose flour
2 tablespoons Hidden Valley Ranch powdered dip mix
(the Dip mix, not the dressing mix)
4 eggs
1) Preheat oven to 425 degrees F.
2) In a small saucepan combine the water, butter and salt and bring to a boil. Reduce the heat and add the flour and dip powder all at once and stir it vigorously with a wooden spoon. Cook until the mixture has formed a ball and has a slightly sweaty sheen to it and it has pulled away from the pan.
3) Transfer the mixture to a mixing bowl and let cool for 3 to 4 minutes. The mixture does not have to be cold, just cool enough not to cook the eggs when added. Using an electric mixer or lots of good old-fashioned elbow grease, beat in the eggs 1 at a time. Do not add the second egg until the first is fully incorporated.
4) Take 1 tablespoon of the dough and place on a baking sheet sprayed with non-stick cooking spray or lined with parchment paper. Make sure to leave about an inch in between each ball as they’ll expand as they cook. Bake in the preheated oven for 20 to 25 minutes, rotating the tray halfway through the cooking time to insure even cooking. When done, the puffs should be light, airy and dry inside. Cool on a rack before cutting. While cooling, you can make your Buffalo Chicken Dip.
Buffalo Chicken Dip
1 tablespoon olive oil or non-stick cooking spray
2 stalks of celery, diced into small pieces
1 small garlic clove, minced
1 – 8oz block of cream cheese
1 cup of ranch dressing
3/4 cup Frank’s hot sauce
1 cup shredded cheddar cheese
(I used an Extra sharp, but mild or pepper jack would work too)
1 cup of cooked, shredded cheddar chicken
1) Heat olive oil (or non-stick spray) in a medium sauce pan over low heat. Once heated, add the celery and garlic and saute for about two minutes. Add the cream cheese, ranch dressing and hot sauce, stirring until the 3 ingredients have combined together. After everything has combined, add the cheddar cheese and chicken, stirring until the cheese has melted.
2) Reduce heat to low and simmer mixture on stove top for about ten minutes, stirring occasionally, until the mixture starts to thicken.
3) In the mean time, your profiteroles should be cooled and ready to be cut. Take each puff and dig out a small hole in the center of each one, almost as you would with a bread bowl, creating a space for the dip to ‘sit in’. (slicing them in half won’t work as well). Place each puff back onto you baking sheet.
4) Add about 2-3 tablespoons of Buffalo Chicken Dip to each puff and then put the top on each puff.
5) Place back in the oven for about 5 minutes, just enough time to reheat the profiteroles. The dip will be hot so you dont have to worry about that.
Thanks for the inspiration TJ – keep up the good work!


With a fresh new year, I’ve been thinking of some fresh new ideas for bloggage. And here it is my friends….

Dave insisted that his head be super imposed on the body of the Swedish Chef from the muppets – and let’s just say the resemblance is frightening
Dave – my husband, my partner in crime, my doggy-daddy, the ‘other half of the newlywed whole’ fueling this blog – really hasn’t gotten much air time since we started just about a year ago. Sure he’s there in the kitchen for better or worse recipes, often times taking the reigns himself and coming up with some really great meals, but to be honest with you, I like to enjoy the full benefits of being cooked for, which includes throwing my feet up with a glass of wine and control of the remote while Dave slaves away in the kitchen.
Diva alert.
So once a week, coming to a kitchen near you, is Dave’s Dish! (let’s hope he doesn’t make quite as much clamor and is easier to understand than the real Swedish chef :))
First up is these AMAZINGLY delicious Maple Chicken wings that we made for that um…big sports game on Sunday night (too soo…still too soon). For those of you that will be continuing to watch football in the next couple weeks, these are a perfect finger food for watching. Took a little bit of patience, but as with most recipes that take a bit of doing, it was well worth the wait.
Maple Chicken Wings
*Adapted from Southern Food
INGREDIENTS
*yields about 3 – 4 dozen chicken wings
4 pounds chicken wings
(preferably the type that are ready to cook so you can avoid the clipping/prepping/etc.)
1 cup maple syrup, dark or grade B
(we used pure Vermont Maple Syrup)
1/2 cup packed brown sugar
2 cloves garlic, finely minced
3 green onions, chopped
1/3 cup reduced sodium soy sauce
1/3 cup teriyaki sauce
1/4 teaspoon ground black pepper
2 pinches of cayenne pepper, optional
*Cilantro, sesame seeds, or chopped green onions, for garnish
(we used green onions & sesame seeds)
1) Line a large baking pan bottom and sides with heavy duty foil.
2) Wash the chicken wings and pat dry. In a large mixing bowl, combine the maple syrup, brown sugar, garlic, green onions, soy sauce, teriyaki, and peppers.


3) Add the chicken wings to the bowl with the marinade. Coat wings evenly with the marinade and then cover the bowl with plastic wrap, letting the wings marinade in the refrigerator for at least an hour, up to overnight (the longer the better).
4) After your wings have marinaded, arrange the chicken wing pieces in the prepared baking pan and pour the sauce over them.
5) Bake the wings for 1 hour at 350 degrees, turning 3 to 4 times during that hour. After an hour, increase the oven temperature to 400 degrees and bake for about 30 minutes longer, turning the wings every 10 minutes to brown evenly.

6) Remove the wings to a serving dish and garnish with chopped cilantro, sesame seeds, or chopped green onion.

“Bork…bork…bork!”

Happy Friday everyone! Here’s a fun Friday Quinoa fact for you:
2013 has been declared International Year of Quinoa by the United Nations (thank you Wiki Wiki Wack Wikipedia). Looks like we were one step ahead of the game with this Quinoa Bite series eh?
Ok, enough jib jab.
One of my favorite things is when you throw a bunch of stuff together, throw it in the oven and keep your fingers crossed that it will come out delicious and it does! That’s just what happened with these Southwest Quinoa Bites. I love me some southwest flavor, as you’ve seen in recipes like Southwest Chicken Burgers and Mexican Pizza.
So why not share the Southwest wealth with Quinoa Bites?
Southwest Quinoa Bites
INGREDIENTS
*yields 12 regular muffin sized bites
2 cups cooked Quinoa
1 cup shredded, cooked chicken
1/2 cup bread crumbs
1 cup cheddar cheese
1/2 cup pepper jack cheese
1 tablespoon olive oil
1/2 cup black beans
1/2 cup canned corn
1 medium red pepper, chopped
2 garlic cloves, minced
3-4 scallions, chopped small
1 tablespoon cumin
1 tablespoon chili powder
3 eggs, lightly beaten
salt & pepper to taste
ranch dressing for dipping
1) Preheat oven to 350 degrees.
2) Place your Quinoa, bread crumbs, cooked chicken and cheeses in a large mixing bowl and set aside.
3) Heat your olive oil in a medium saucepan over medium heat. Once the oil is heated, add your black beans, corn, red pepper, garlic, scallions, cumin and chili powder and saute for 3-5 minutes. The goal here isn’t to cook the vegetables through, but simply allow the flavor of everything to combine a bit before adding it to the rest of the mixture.
4) Add the veggie/spice mixture to the quinoa/chicken/bread crumbs/cheese and allow it to cool for a few minutes before adding the eggs (about 5 minutes). You can then add the beaten eggs and combine the mixture. Season with salt and pepper to taste.
5) Take a regular sized muffin tin (12 muffins) and spray with non-stick cooking spray. Add about 1/3 cup of the mixture to each muffin slot.
4) Bake in your preheated oven for 30 minutes. Serve with a side of Ranch dressing for dipping!
Since this was dinner, I decided to use a regular sized muffin tin vs. the mini-muffin tin, but these would certainly be great bite sized as well! Served with a nice side salad, it was a perfect, healthy and scrumptious dinner. If you wanted to add a little kick to these, you could always toss some crushed red pepper flakes in with the cumin and chili powder! I personally like when my lips aren’t on fire, but to each his own 🙂

Worst part of this week = having to pack a lunch for FIVE WHOLE DAYS! It’s been weeks since I’ve put in a 40 hour’er – the joy of Christmas brings with it the joy of consecutive 4-5 day weekends. But now, the grim reality that the next company holiday won’t be here until the snow is melted and my brown puffy down coat has been retired for the Winter. Sigh.
Thank god I have these delicious Roasted Red Pepper, Spinach and Goat Cheese Quinoa bites to look forward to at lunch 🙂
Roasted Red Pepper, Spinach & Goat Cheese Quinoa Bites
INGREDIENTS
*yields about 34 bites
2 cups cooked quinoa
1 tablespoon olive oil
1 small jar of roasted red peppers, chopped
2 cups frozen chopped spinach
2 garlic cloves, minced
4 ounces goat cheese, crumbled
2 eggs, lightly beaten
salt and pepper to taste
1) Preheat your oven to 350 degrees.
2) Heat the olive oil in a medium sized skillet over medium heat. Once the oil is heated, add chopped red peppers, spinach and minced garlic and sautee for about 5 minutes, until all the liquid from the peppers and spinach has evaporated. Remove from heat.

3) In a large mixing bowl, combine the cooked quinoa, spinach/red pepper mixture and crumbled goat cheese. Mix together to allow the goat cheese to melt. Once the mixture has cooled a bit more (about 10 minutes), you can then add the eggs and mix together. Season the mixture with salt & pepper to taste.

4) Spray a mini-muffin pan (24 count) with non-stick cooking spray, making sure to spray the top of the pan as well to avoid the bites from sticking. Place one tablespoon of the mixture in each muffin slot and bake in your preheated oven for 15-20 minutes.

These are a nice light option for lunch or even a snack. They’d also be a great appetizer for your next ladies night! Healthy, yummy and would go nicely with red OR white 🙂


Back to the office this morning, sporting my stretchiest and most forgiving pants with the taste of turkey still on the brain – I hope everyone had a great, great, great Thanksgiving weekend 🙂
The last four days were full of:
Turkey…
Dessert…

“Mikey (or my cousin Jack) likes it!”
Some kitchen mishaps…

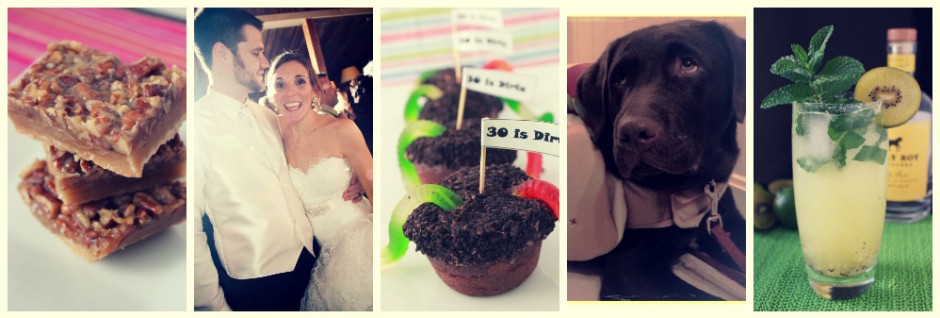
After attempting to make/blog my Grandmother’s amazing pecan rolls, I accidentally left the dough out overnight and THIS is what it looked like in the morning – I won’t confirm or deny if a few T-day eve cocktails were to blame…nope…
And now Christmas is in full effect at the Schoon house!
 But still, I was itching to make good use of our leftovers, especially the stuffing. I don’t know about all of you, but for me Thanksgiving isn’t about the turkey or the pies – it’s about the stuffing. I.love.stuffing. I could eat it for days (and did). And I feel as though it never tastes as good at any other time of year than it does on Thanksgiving. This year, I made the standard and also a Cornbread Bacon stuffing from Martha Stewart that was so delicious! We had so much of it leftover, I did all kinds of googling to see what I could do with it. But I wasn’t finding anything that I thought sounded good. Then for some reason, meatballs popped into my head, not really sure why. But I thought “Why not take the stuffing as the ‘meat’ you’d use in a meatball, and prepare a ‘stuffing’ ball in a similar fashion?”. So I pulled up the recipe for Paula’s Crockpot Meatballs, made a few adjustments, gave it a shot, and most times when I go at things in this fashion, there’s always something that goes awry, but not this time!
Leftover Stuffing Bites
INGREDIENTS
*yields 10 larger size balls or 20 smaller ‘bite size’ ones
1.5-2 cups leftover stuffing
(If you don’t already have stuffing, Pepperidge Farm has a really nice stuffing mix that is super fast and easy to make that would work well with these too!)
1 egg
1/4 cup plain breadcrumbs
1/2 cup freshly grated parmesan cheese
1/2 tsp. garlic powder
FOR DIPPING SAUCE
1 cup mayonnaise
2 tbsp. honey mustard
1) Preheat oven to 350 degrees.
2) Combine egg, breadcrumbs, parmesan cheese and garlic powder in a small mixing bowl to form a paste.
3) Add the leftover stuffing to the paste, mixing with a spatula (or just your hands) until it becomes a dough like consistency.
4) Take 2 tbsp of the stuffing dough (for larger sized balls – 1 tbsp. for bite sized) and roll between the palms of your hands to form a ball. Place stuffing balls on a baking sheet coated with non-stick cooking spray.
5) Bake in preheated oven for 10 minutes – flip over and then cooking for another 10 minutes on the other side (20 minutes total).
6) Mix honey mustard and mayo together in a small mixing bowl and serve with stuffing balls as a dipping sauce.
I asked Dave to try one, and he said “It tastes like stuffing” (deep thoughts). Which it did – but it has a nice moist texture, similar to that of a meatball, with the same great flavor that everyone loves about stuffing. It’s a great way to re-purpose your leftovers, or if you don’t have the stuffing leftover, you could whip up a quick Pepperidge Farm batch and serve these as an appetizer at your holiday parties. And people will say “Hey, these taste like stuffing! YUM!” – GENIUS! Feel free to adjust the spices/seasoning if you wish – I wanted to go light on that aspect of it, only because the stuffing itself already has so much flavor that you don’t need to add a whole lot to it.
Well folks, that’s my last T-day recipe for ya – next will be ALL Christmas – ALL the time – get excited – I know I am!
*Many apologies for the less than appetizing picture – I was preoccupied with skipping through the house putting up Christmas Decorations when I realized I needed to snap a pic of these yummies before it got dark at 4pm – damn you natural light! They taste MUCH better than they look in the pic, swear!

I’m sure you’re thinking “Carrot Souffle? What in the world?”
I know – I know – but bear with me here…
A few years back, Dave and I attended a holiday dinner party at his former bosses house, and his wife did a bang up job with dinner! I remember sitting down to the table with bug eyes at how amazingly delicious everything looked – except for this one orangey looking thing, covered with nuts. I started to sweat, because it’s really in poor taste to not try everything at a dinner party, so I scooped a little teeny smidgen of it, and went at it with my fork in one hand and my glass of wine in the other, just in case I needed an emergency wash down.

I took my first teeny little bite, small enough that I could taste what I was eating but not so much so that if I was about to gag it would be totally obvious – and thought “oooh, mmmm….this is pretty good actually.” My next bite was bigger, and after only a couple bites my small little scoop was gone – but I wanted more! So I took seconds….thought about thirds but didn’t want to embarrass Dave in front of his co-workers by stuffing my face. I knew I had to have the recipe and finally, she emailed the recipe to Dave and he forwarded it to me, and since then, it’s become a staple at Thanksgiving and Christmas, like the mashed potatoes or green bean casserole. It’s a light and fluffy combination of pureed carrots and lots of other ingredients that are better not to know – but luckily for you, I’m gonna share them, right now!
Carrot Souffle
*Dave’s former bosses fabulous cook of a wife! (guess I should have gotten her name, eh?)
INGREDIENTS
*yields enough for a 9×13″ baking pan for a larger crowd – halving it would be just enough for an 8×8″ dish
4 lbs carrot, cooked and pureed
12 eggs
(I know – seems like a lot!)
1 & 1/3 cups sugar
8 tbsp flour
4 tsp baking powder
4 tsp vanilla
few dashes of cinnamon & nutmeg
For the topping
1 cup cornflake crumbs
4 tbsp. brown sugar
2 & 1/2 tbsp. butter, melted
1 cup chopped pecans
1)Preheat oven to 350 degrees. Prepare your baking dish by greasing the bottom and sides with butter or non-stick cooking spray.
2) Cook the carrots in boiling water until fully cooked through. Puree them with an electric mixer or food processor and allow to cool completely. In the mean time while they’re cooling, you can prepare the topping by pulsing the corn flakes in a food processor (or just crushing with your hands in a ziplock), then adding them to the brown sugar, melted butter and pecans.
3) Once the carrots are completely cooled off (the eggs will cook when you add them to the carrots if they haven’t cooled enough), add all of the other ingredients and blend with a mixer until fully combined.
4) Pour carrot mixture into the dish and then top with cornflake/pecan topping. Feel free to make more of the topping if you’d like – it is quite delicious!
5) Bake souffle in preheated oven for 1 hour.
This Carrot Souffle is a sweet treat for your tastebuds to take bites of in between the turkey and stuffing and mashed potatoes and green bean casserole and….
Is it Thursday yet?

I’m not afraid to admit when perfectly laid out recipes go astray.
Last Thanksgiving, we had some friends over for a makeshift ‘Thanksgiving Dinner” and our friend Alissa brought this pumpkin dip with various treats to dip in it, and OMG – it was beyond good. And the best part was that it was served in a hollowed out pumpkin! Major points for presentation!
So this past Sunday, Dave, Hairy and I had plans to meet up with my cousin Catherine and Buddy and my Aunt Jane at Buddy’s fab apt. in the north end (recess lighting and all). Pizza from the ORIGINAL Pizzeria Regina, which is right around the corner from his apartment (I swear I’d be well over 300 lbs if I lived there) was on the menu, so I decided I was going to make this pumpkin dip as a nice ‘lighter’ option for dessert.
Ooof.
I literally stood over the bowl with the electric mixer for a good 10 minutes, just waiting for all these little lumps of cream cheese to disintegrate. But it didn’t happen. And while it tasted pretty good, I am a firm believer that you taste with your eyes just as much as your mouth, and the sight of this mess of a dip even made me, someone who never passes on dessert, want to say “Ahhh ya know what? I am just SO full I think I’ll pass on dessert!” I was so ashamed of it, I frustratedly tossed it in the dumpster outside of Buddy’s apartment as we were walking to our car – $1 leaf bowl from Target and all.
But I was determined to make this better somehow. So I tried it again last night, using essentially the same recipe, but using a different process to combine them together, and BINGO!!!! We have a winner!
Pumpkin Cheesecake Dip
*Adapted from Allrecipes & Very Best Baking
INGREDIENTS
*makes about 1.5 cups – perfect amount for a small pumpkin!
1 – 8oz block of cream cheese, softened (room temp is ideal)
1/2 cup pumpkin puree
1 cup powdered sugar, sifted
1 tsp. pumpkin pie spice
1) In a large mixing bowl, combine the cream cheese and pumpkin puree with an electric mixer on low until both are fully combined and smooth.
2) Gradually add the powdered sugar to the pumpkin/cream cheese mixture (I did about 1/3 at a time) mixing well in between.
3) Add the pumpkin pie spice and mix well until all ingredients are combined and smooth.
4) Chill in the refrigerator for at least an hour (up to overnight). Serve with whatever you see fit to dip! Personally I think that chocolate goes really nice with this, so I used chocolate animal crackers, graham crackers and bite sized oreos, but the options are endless!
So what was the difference between the two?
In version 1, the directions said to mix the softened cream cheese and the powdered sugar together until smooth – without sifting the sugar first, causing big sugary lumps of cream cheese to form before the pumpkin even went into the mixture. After that, there was no going back, no matter how much you mixed.

The second version though, I mixed the pumpkin and cream cheese together first, until smooth, and then gradually add the sifted confectioners sugar, which honestly makes perfect sense now that I look back, but at the time I just followed the instructions without giving it any thought.
Finally, after 2 tries, it was what I had always envisioned it being – a deliciously smooth combination of pumpkin and cream cheese that’s fun to eat and ridiculously easy to make. Feel free to tweak the measurements of pumpkin too, adding more or less depending on your pumpkin tastes. And, putting it in a cute hollowed out little pumpkin = genius. Perfect for a pre-dinner dessert for people to graze on, or a nice, lighter alternative for people after the big meal is over, as you can dip as much or as little as you like – it’s commitment free!
So go now and dip it. Dip it good 🙂

Not only did a Hurricane blow through this week, but so did Halloween! Luckily, Sandy swept in and out just in time for a cool, fall night for the kiddos to do some trick or treating. And this guy got to hand out lots of candy…
- the before….

…and after
I was trying to find the perfect Halloween dinner (hot dogs were off limits) and I went through lots of pumpkin/squash/fally’ type entrees. But then, for some reason, short ribs popped into my head, followed by tacos. So boom – Short Rib Tacos it was! I investigated a variety of different recipes, but this one from So Tasty, So Yummy sounded like the best flavor combination to me. I took the base of it, added a little of this and a little of that, and I don’t often throw rose petals at myself, but Halloween night, it was a shower of rose petals, because man were these good! We paired them with those delicious Pickled Red Onions from the Southwestern Pulled Brisket Taco recipe, some cilantro and fresh homemade salsa, and oooh it was a Halloween dinner to remember!
Short Rib Tacos
*Adapted from So Tasty, So Yummy
INGREDIENTS
8-10 short ribs (bone in or boneless)
1 tbsp salt
1 tbsp pepper
1 tbsp cumin
1 tbsp chili powder
1 tbsp garlic powder
2 small cans of black beans
1 – 14.5 oz can tomatoes w/ green chilis
1 – 14.5 oz can regular diced tomatoes
(I used the basil flavored but I don’t think it matters – if you wanted to kick up the heat, you could probably use 2 cans of the tomatoes w/ chilis)
4 tbsp olive oil
1 onion, chopped
4 garlic cloves minced
1/2 – 1 tsp red chilli flakes
juice of 2 limes
3 cups beef broth
*corn or flour tortillas
*queso fresco
*fresh salsa
*chopped cilantro
1) Mix the salt, pepper, cumin, chili powder and garlic powder in a bowl. Rub each short rib in the spice mixture and place them in a large ziplock bag. Let marinade in the fridge for at least an hour (obviously, the longer the better! I think I did mine for about an hour and a half)
2) In a food processor, take the 2 cans of black beans and the 2 cans of diced tomatoes and puree together. Set aside.
3) In a large dutch oven (or heavy pot) heat 4 tbsp. olive oil. Brown each short rib on both sides and then set aside on a plate.
4) To the same dutch oven, add the chopped onions and saute until translucent (about 3-4 minutes). Then add the garlic and chili flakes and saute another minute, or until fragrant.
5) Add the beef broth, lime juice and black bean/tomato puree to the garlic and onion mixture, scraping the brown bits from the short ribs. Return the browned short ribs to the dutch oven in a single layer and let come to a boil.
6) Reduce heat to low and cook the short ribs on low heat for up to 4 hours, depending on how much time you have (the longer cooked, the more tender the meat). After about an hour and a half, shred the short ribs and return the shredded meat back to the sauce to soak in the flavor. If they’re on a bone, the meat can be removed from the bone and shredded, or if they’re boneless, you can just shred the meat.
7) Be sure to reserve some of the sauce from the short ribs and reduce it for 10-15 minutes before serving. It’s a great little accompaniment to the tacos!
Serve the short ribs on corn or flour tortillas with the reduced sauce, some salsa, queso fresco and cilantro. Mmmmmmm.
Hope everyone had a happy and safe Halloween!